
Online dermatology intake with photo upload: how to build it
How to build an online dermatology intake with photo upload: step order, photo guidance patients can follow, skin photos as PHI, and what clinicians need.
Written for operators and product leads at teledermatology, skincare and async telehealth brands
An online dermatology intake with photo upload works best in this order: the patient’s main concern, where it is on the body, photos taken with clear guidance, a short history of the problem, medical history and medications, then consent. The photos are the heart of an async derm visit, so the flow has to teach the patient how to take usable ones at the moment they take them. Everything after the photos exists so the clinician can read those images in context.
What is an async dermatology intake?
It is the online form a patient completes so a dermatologist or other clinician can review their skin concern without a live visit. The clinician reads the answers and the photos later (store-and-forward, in telehealth terms), then replies with a plan, a prescription, questions, or a referral to an in-person visit.
Two things make it different from a general patient intake:
- The images carry most of the clinical information. A blurry photo under yellow kitchen light can make the rest of the intake useless, and the clinician has to message the patient for a retake.
- The photos are sensitive in a way checkbox answers are not. A face photo identifies the patient on its own. Body photos may show areas the patient would not show anyone else.
If you also run live video visits, the same intake can feed both. See async consult flows for how the review side fits together.
The step structure
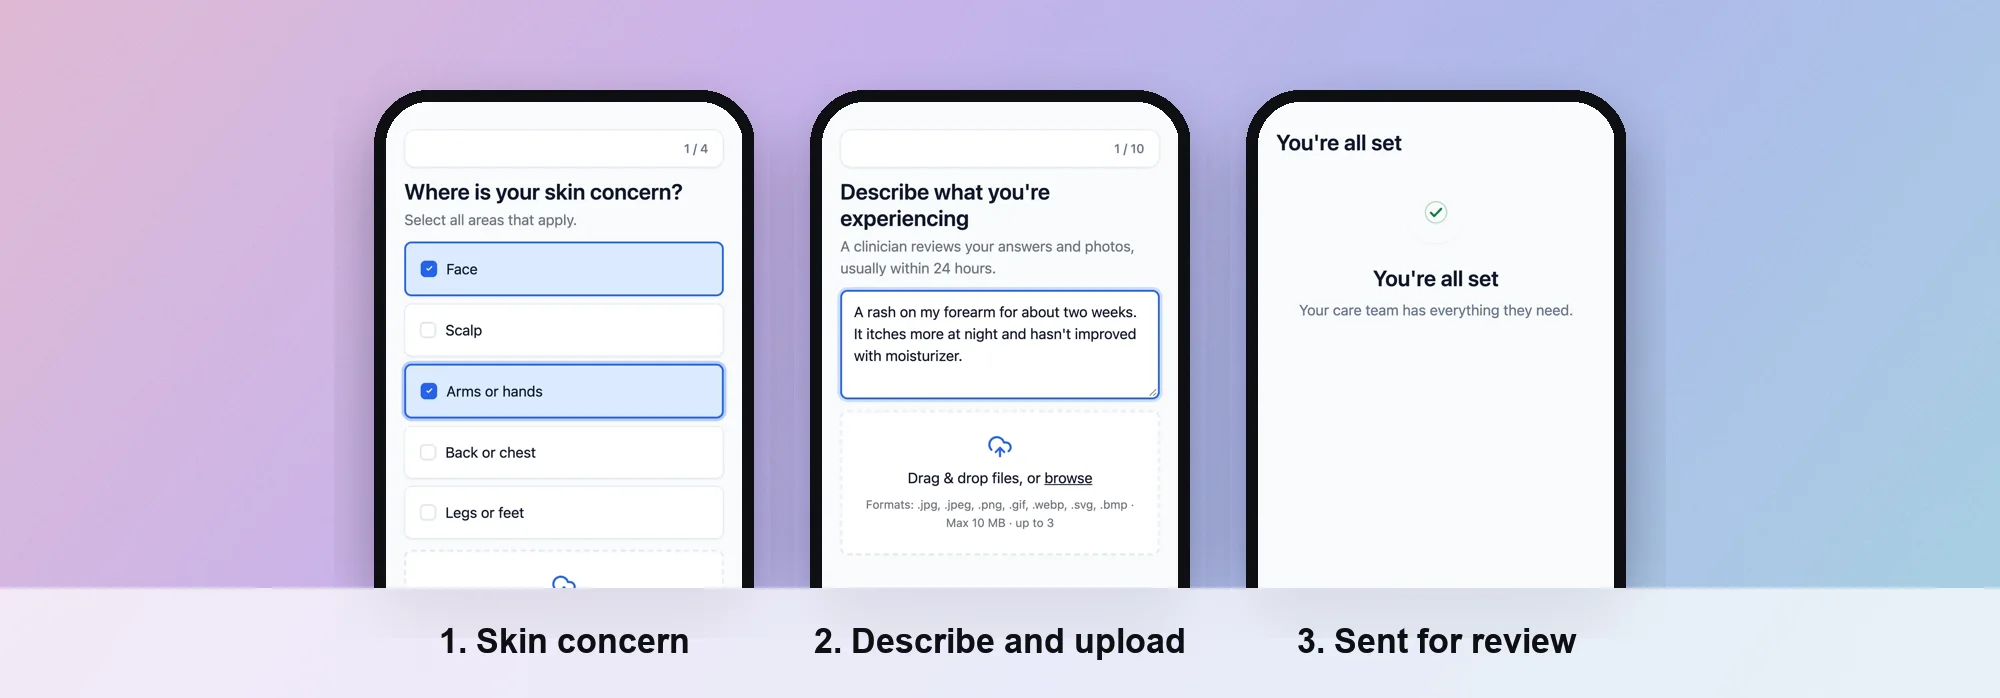 Screens from a PathwAI flow.
Here is a sequence that works for most async derm programs. Your clinicians decide the exact questions and which concerns you treat online at all.
| Step | What it asks | Why it sits here |
|---|---|---|
| 1. Concern | ”What would you like help with?” (acne, rosacea, eczema, a changing mole, hair or nails, something else) | Easy, personal, and it drives routing for every later step |
| 2. Body area | Where it is, as tappable areas or a short list (face, scalp, trunk, arms, legs, hands and feet, other) | Tells the photo step what to ask for and flags areas you may handle differently |
| 3. Photos | Guided upload: a wide shot, a comparison shot, a close-up | The clinical core; asked while the patient is still motivated |
| 4. Description | How long, how it changed, symptoms (itch, pain, bleeding), what they tried | Gives the clinician the story behind the images |
| 5. Medical history | Conditions, allergies, pregnancy or plans to become pregnant where relevant, skin history | Safety screening your prescribers define |
| 6. Medications | Current prescriptions, supplements, topical products | Interactions and prior treatment |
| 7. Identity and contact | Name, date of birth, state, contact details | Licensure by state and record matching |
| 8. Consent | Telehealth consent, photo use, terms | Must be acknowledged before submission |
| 9. Done | What happens next and when | Sets expectations so the patient waits instead of churning |
Photos before long history. Photos are the step patients are most likely to postpone. Asking for them third, while intent is high, gets more of them taken. Some brands put photos last, so the patient is “almost done” when they reach the hard step; test both orders with your own traffic before deciding.
Route early, not at the end. Some concerns should not go through an async flow at all. Which ones is a clinical decision. If your clinicians want a rapidly changing mole or a fast-spreading rash routed to an in-person visit, that branch belongs right after the concern and body area steps, before the patient spends ten minutes on photos.
State before payment. If your clinicians are licensed in specific states, ask the state before any checkout step so nobody pays for a visit you cannot provide.
Photo guidance patients can follow
Most bad derm photos come from four problems: poor light, a busy background, camera filters, and only one close-up with no context. The American Academy of Dermatology’s patient guide, how to take pictures of your skin for your dermatologist, addresses all four. Its advice, in short:
- Remove makeup or nail polish from the area first, and wait if the skin looks irritated afterward. The AAD notes that hot water, soap or fragrance may cause inflammation that can hide the condition.
- Use bright light from a window, or a desk lamp or flashlight as a backup, falling on the area from in front of you rather than from behind.
- Use a plain, single-color background such as a wall, door or solid fabric, with no people, animals or objects in the frame.
- Turn off camera filters and wait until the detail looks crisp.
- Take three photos: an orientation shot showing where the concern is on the body, a comparison shot that includes unaffected skin around it, and a close-up with the detail.
- Show size with a coin, pencil eraser or ruler beside the spot, without covering any of it.
- Review before sending: in focus, free of shadows and glare, and showing what the patient sees.
For clinics, the AAD teledermatology standards say the AAD recommends patients use a digital camera with a minimum resolution of 800 x 600 pixels, and that the platform delivering the photo should offer 128-bit encryption and require password-level authentication. The encryption point is about your platform, covered below.
Turning that guidance into screens
A wall of tips before the upload button gets skipped. Put the guidance where the patient acts:
- One upload slot per shot, each labelled with its purpose: “Where is it? (step back so we can see the area)”, “Next to normal skin”, “Close-up”. Three named slots get three different photos. One slot labelled “Upload photos” gets three close-ups.
- One line of guidance per slot, with a small example image if you have one. “Face a window. No flash, no filters.” is enough.
- A short checklist before the upload step, for the things that need preparation: remove makeup, find a window, ask someone to help for hard-to-reach areas.
- A help path for the patient who cannot do it now. “I’ll add photos later” with a reminder is better than a closed tab. Whether a submission without photos goes to review is your clinicians’ call.
Face and body photos
Facial concerns need face photos, and that is fine; just say why you are asking. For other areas, tell patients they can crop or cover anything outside the concern, and for intimate areas, decide with your clinicians whether photos are requested at all or whether those concerns route to a live visit instead.
Handling skin photos as PHI
When a covered entity or its business associate collects skin photos alongside health information, those photos are protected health information under HIPAA. Under the HIPAA de-identification rule, “full face photographic images and any comparable images” are on the list of identifiers that must be removed for data to count as de-identified (45 CFR 164.514(b)(2)). So a face photo is identifying on its own, and a body photo sitting next to a name and date of birth is PHI like any other answer in the form.
What that means in practice:
- Uploads go to storage covered by your BAA, not to a general file-sharing link, an email inbox or a chat tool. Every vendor that stores or processes the images needs a business associate agreement with you.
- Encrypt in transit and at rest, and limit who can open the images to the people who need them for care.
- Keep photos out of marketing tools. Ad pixels, session replay and analytics scripts should never see an image, a file name or the upload step’s contents. Track that a step was completed, never what was on it. Our HIPAA intake playbook covers this split in detail.
- Watch the metadata. Phone photos can carry metadata such as the time and, depending on settings, the location they were taken. Decide whether your storage keeps it.
- Ask only for what the clinician uses. HIPAA’s minimum necessary standard applies to uses and disclosures of PHI. Three purposeful photos beat ten random ones for the patient and for your risk.
- Say how photos are used in the consent step: who sees them, that they are part of the medical record, and whether any are used for anything beyond care. Your legal and clinical team writes that wording.
This is not legal advice. Your privacy counsel decides how these rules apply to your program.
What the clinician needs on one screen
The intake is only as good as the review it produces. Ask your clinicians what they want to see, then shape the output around it. Most want:
- The concern and body area as a headline, not buried in answer 14.
- The three photos together, in the orientation, comparison, close-up order, at full resolution.
- Duration and change over time, symptoms, and what the patient already tried.
- Allergies, current medications and relevant conditions in a scannable list.
- Flags from routing: a pregnancy answer, a red-flag symptom, a state you do not cover.
- Consent status and time, so nobody has to ask whether it was given.
How to do it in PathwAI
PathwAI is an AI-native patient acquisition platform: an agent drafts the flow from a plain-English description and your team reviews and approves it. Here is how the derm intake above comes together.
- Describe the program to the agent. For example: “Async dermatology intake for acne, rosacea and eczema, adults in the states we cover, three guided photos, medical history, medications and telehealth consent.” PathwAI generates a draft with steps, patient-facing copy and routing. Nothing publishes without your approval, and consent wording must be reviewed by your clinical or legal team. No patient data is used in generation prompts. See AI agents.
- Build the photo step with file upload fields. Use one file upload field per shot, each with its own label and line of guidance, on the visual builder canvas alongside the other steps.
- Add routing. Routing rules branch on any answer or combination of answers. Send concerns your clinicians do not treat online to a custom message or another path, route patients outside your states to a waitlist, and skip questions that do not apply to the concern chosen.
- Optionally add an AI Scan step. AI Scan analyzes a photo with Claude, GPT or Gemini on your own API key. What you ask it to do, and whether it is used at all, is a decision for your clinicians; it does not replace their review.
- Make consent a real step. Patients must acknowledge consent before continuing, and the consent is timestamped and stored with the intake data.
- Add what comes after review. Steps can take payment through Stripe or Authorize.Net, book a follow-up through Cal.com, or verify identity through Persona, and the intake can go to tools like Healthie through PathwAI’s integrations.
- Preview and publish. Share a preview link with your clinicians, then publish to a hosted link on your own domain or embed the flow on your website.
- Watch each step. Step-level analytics show completion and drop-off for every screen, so you can see whether the photo step is where patients leave, and A/B test photo-first against photo-last. See analytics and A/B testing.
PathwAI signs a BAA on the Enterprise plan, encrypts data in transit and at rest, and is not an EHR. More on the vertical at dermatology intake.
Checklist before launch
- Concern and body area come first and drive routing
- Concerns your clinicians do not treat async are routed out early
- Three named photo slots: orientation, comparison, close-up
- One line of photo guidance per slot, plus a prep checklist
- An “add photos later” path, with your clinicians’ rule for submissions without photos
- State asked before any payment step
- Every vendor that stores or sees images is under a BAA
- No pixel, replay or analytics script can see the upload step’s contents
- Consent explains how photos are used, reviewed by legal and clinical
- Clinician review screen tested with real iPhone and Android uploads
Frequently asked questions
How many photos should a dermatology intake ask for?
Start with three per concern, following the AAD’s patient guidance: an orientation shot, a comparison shot with nearby unaffected skin, and a close-up. Your clinicians may want more for specific concerns, such as several angles of a widespread rash.
Are skin photos PHI under HIPAA?
When a covered entity or business associate collects them with health information, yes. Full face photographic images and comparable images are listed among the HIPAA de-identification identifiers, and any photo linked to a patient’s record is part of their PHI.
Should photos come before or after the medical history?
Many flows ask for photos early, while the patient is most motivated, and others save them for last. There is no universal answer, so test both orders with step-level analytics on your own traffic.
Can AI review the photos?
PathwAI’s AI Scan step can analyze a photo with Claude, GPT or Gemini on your own key. Whether and how to use it is a clinical decision, and a clinician still reviews the case.
What if a patient cannot take good photos?
Give them a way to continue later, such as a reminder link, and let your team request a retake. Clear, per-shot guidance on the upload step prevents most retakes in the first place.